Monday, December 31, 2012

Henry Says Happy New Year!

I just couldn't pass up this whimsical elephant stamp set, Henry Says, available in the upcoming Spring Catalog. I love all the accessories included...like the banner which can hang from his outstretched trunk.


I stamped Henry on new Sycamore Street DSP, which is available as a FREE selection during Sale-A-Bration 2013! I love the bright colors and fun patterns in this paper pack. After stamping Henry on the DSP and cutting him out, I added a little shading using my Aqua Painter and some Island Indigo Ink. His little eye got lost in all that pattern of the paper so I colored a small Basic Pearl black using a sharpie marker and gave him a new eye.

Isn't the Pool Party Satin Ribbon pretty? It's part of the Sycamore Street Ribbon & Button Pack, also  available as a FREE selection during Sale-A-Bration! You can get these items starting January 22nd...so contact me to host a party or to attend one of my events! While SAB items aren't available for a few weeks yet, Henry is available starting January 3rd from the Spring Catalog.

Like Henry, I would also like to wish you a very happy, healthy & creative New Year!!! If you are going out tonight to celebrate...be safe!

Saturday, December 29, 2012

Snow Flurry Candle Wrap

I hope you had a wonderful Christmas! Today I want to share a sparkling table decoration I made for the holidays. I love the battery operated candles that you can get now. Especially the ones with timers that come on every evening...they even smell good, and I don't have to worry about my kitty burning his whiskers off or knocking them over when he gets curious. However, they are kind of plain...so I made a pretty wrap to dress them up.

I used: Snow Flurry Bigz Die, Silver & Champagne Glimmer Paper, Always Artichoke card stock embossed with Lacy Brocade Embossing Folder and spritzed with Vanilla Shimmer Smooch Spritz, Adorning Accents Edgelit, Vintage Faceted Designer Buttons and lots of Basic Rhinestones. Here's how they look on my table.
Isn't the quilted table runner gorgeous? It was a Christmas gift made by my talented Mom. She also made me a quilted wall hanging that holds Christmas cards...you can see part of it hanging on the wall behind the table. I'll have to get another photo so you can see the entire quilt. (she takes orders!)

The red vase/candle holder in the center was a happy find that really coordinates well...the snowflake even has rhinestones on it. I used velcro to secure the wrap to the candle, this way they are easy to remove and I can make different ones for each season. Here is one I made this past fall.

We got snow on Christmas Eve, so we were blessed with a white Christmas again this year. I'll leave you with a pretty shot of our Christmas sunrise view out our front window.

Thanks for stopping by today!

Sunday, December 23, 2012

Shimmering Christmas Deer

Here is another one of the Christmas cards I sent out to our family and friends this year.
I used Winter Wonderland embossing powder on the Christmas Deer image...which is white, and loaded with silver & iridescent sparkle. The Whisper White layer was embossed using the Lacy Brocade Embossing Folder and then spritzed with Vanilla Shimmer Smooch Spritz. I wish you could see just how these cards sparkle & shimmer but I just didn't get a good photo capturing the sparkle. Here's a closer look where you can kind of see the sparkle & shimmer...
I used Snow Festival DSP along with some retired Deck the Halls DSP to coordinate with the Cherry Cobbler & Always Artichoke card stock. Along with the Christmas Deer stamp set I also used Bells & Boughs (sentiment) and the swirl from Creative Elements.

This will probably be my last post before Christmas, so I want to wish you and your family a wonderful Christmas!

Stevie says Merry Christmas too!


Friday, December 21, 2012

Bells & Boughs With Ornament Keepsakes

This is one of the Christmas cards we made at my Christmas Card Class earlier this month. It is also one of 4 cards that I designed to send out to our family & friends this year.

The Raspberry Ripple layer was stamped with the pretty pine & poinsettia image from Bells & Boughs. The ornaments were all stamped in Wild Wasabi and cut out using the Holiday Ornament Framelits. The "Merry Christmas" sentiment is from the Mixed Medley Hostess Set available from the Holiday Catalog. This card was one of the favorites at the class...I hope my family & friends I sent it to liked it as well.

Here are some cute & quick tags I made for bags of cookies I took to my cookie exchange party. I used sparkly white embossing powder on those. They really dressed up my cookie bags.

I still have baking & wrapping to get done...so I better run!

Thursday, December 20, 2012

Snow Much Fun Luminary Easel Card

While browsing the SCS gallery one day I came across this beautiful card and thought it was such a fantastic idea to create a luminary from an easel card...so of course I had to try one!

I love the sparkly snowflake cut from Silver Glimmer Paper using the Snow Flurry Bigz Die! I colored a Basic Rhinestone with a sharpie marker to coordinate with the Gumball Green Stitched Satin Ribbon. I got my color combo of Baja Breeze, Gumball Green, Cherry Cobbler & Primrose Petals from the cute Snow Festival DSP. I used those color markers to color the cute snowman image which is embossed using Silver EP on Cardstock Vellum. The snowflakes from Snow Swirled were stamped using White Craft Ink. The "Warm Winter Wishes" sentiment is from my retired Snowflakes set. Here's a look at what they look like lit with a flameless candle.


Thanks for stopping by today!

Monday, December 10, 2012

Mixed Bunch Medley

I really love the bright, cheery color combo of this card we made at my recent All Occasions Card Class...especially on a dark dreary morning like we are having today.
The base is Pool Party, the embossed Perfect Polka Dot layer is Island Indigo, the Mixed Bunch flower is Primrose Petals, as is the Stitched Satin Ribbon. The strip at left is Raspberry Ripple and the leaves were punched from Certainly Celery using the Bird Builder Punch.

The sentiment, from the Blooming With Kindness set was stamped in Raspberry Ripple ink. The small, scalloped flower is from the Hostess set Mixed Medley and was punched using the 1-1/4" Scallop Circle Punch which is new in the Holiday Catalog. The Basic Rhinestone center was colored with a sharpie.

Thanks for stopping by today.

Monday, December 03, 2012

Cherry Stippled Blossoms

I had been eyeing the Stippled Blossoms set since it first came out in the new catalog in June...I really, really tried to resist since I have so many floral stamps in my collection already...BUT, as you can see my resistance was futile! I'm sooo weak! Anyways... here is my first creation using this beautiful set.
Stamps: Stippled Blossoms, Blooming With Kindness & En Francais
Card stock: Pink Pirouette, Crumb Cake & Very Vanilla
Ink: Pink Pirouette, Crumb Cake, Cherry Cobbler, Early Espresso, Old Olive & Always Artichoke
Accessories: Window Frames Framelits, Framed Tulips Embossing Folder, Basic Pearls, Cherry Cobbler Seam Binding Ribbon & Victoria Crochet Trim

I got all my holiday decorating done over the weekend and the house feels so festive...it really put me in the Christmas spirit! Today I will be working on Christmas cards. Have a great day!

Friday, November 30, 2012

Vintage Christmas Deer

It's hard to believe that the month of November has flown by so fast! I'm feeling in the Christmas mood today...looking forward to decorating our tree later on this evening, so with that in mind I have an elegant Christmas card to share with you today. This is a card that we made in my Faux Fun Class a while back using one of my favorite new Christmas sets...Christmas Deer.

The cool looking background was created using the Faux Patina Technique. Here's a little closer look at that...

Stamps: Christmas Deer, Ornament Keepsakes, Delightful Decorations
Card stock: Always Artichoke, Early Espresso & Whisper White
Ink: Early Espresso,  Always Artichoke, Marina Mist, Cherry Cobbler & VersaMark
Accessories: Holiday Ornaments & Labels Framelits, 3/4' Circle Punch, Vintage Wallpaper Embossing Folder, Cherry Cobbler Seam Binding Ribbon, Gold Embossing Powder, Basic Rhinestones & Festive Paper Piercing Pack

Have a wonderful weekend!

Tuesday, November 27, 2012

Mixed Medley Snow Flurry

We had some snow flurries here in SE Michigan over the weekend...but they sure weren't as pretty and sparkly as this snowflake created with the Snow Flurry Bigz Die and Silver Glimmer paper!

I used the triple time stamping technique to create my background. If you have not tried this yet, it's so easy...just cut 3 sizes of card stock...in this case Baja Breeze was used, and adhere together using temporary adhesive, centering each piece on top of the other. Stamp all three pieces at the same time, making sure to over lap the images onto more than one of the layers. I used the snowflake medallion image from the Mixed Medley Hostess Set inked in Not Quite Navy and the En Francais background stamp inked in Baja Breeze. After stamping, I adhered each layer to a piece of Not Quite Navy card stock cut 1/4" larger. I originally saw this technique shared by Dawn, and she has a great video showing exactly how to do it.


I used the largest & medium sized snowflakes adhered together with a dimensional, and the Merry Christmas image from Mixed Medley cut using 3/4" Circle Punch. Do you like the pretty blue rhinestones? I just colored SU! Basic Rhinestones with a sharpie marker...its a great way to have rhinestones or pearls in any color you would like!

Thanks for stopping by today.

Friday, November 23, 2012

French Foliage Thank You

I hope you all had a wonderful Thanksgiving yesterday! Things around my house have been crazy busy this past month, so it's been a while since I posted anything new. It always takes a while to pack away all the decorations after our annual Halloween party, and this year just as we were done with that we had to get ready for a 10 day trip to Florida. We spent several days at Disney World...which I just LOVE, so we had a wonderful time!

Here is a card I made earlier this month but haven't had time to post.

Stamps: French Foliage, Four Frames & Just Belive
Card stock: More Mustard, Early Espresso, Cajun Craze & Very Vanilla
Ink: More Mustard, Early Espresso, Cajun Craze & Alwyas Artichoke
Accessories: Crumb Cake Seam Binding Ribbon, Decorative Label Punch, Adorning Accents Edgelits & Embossing Folder

I recently received a SU! order I haven't even touched yet so I'm looking forward to spending some time stamping this weekend! If all goes well, and I haven't totally lost my mojo after such a long break, I should have more to post real soon! Thanks for stopping by today...enjoy your weekend!

Wednesday, October 31, 2012

Trick or Treat!

Happy Halloween to you! Each year we have a Halloween Party which we hold out in our barn. We really get into decorating our yard and barn for the party. A lot of our friends & family look forward to our party each year and go all out with their costumes, I always look forward to seeing what everyone comes up with! There are always a few that are downright hilarious...and this year was no exception!  It really does makes for a fun evening! This year I sent out invitations that I designed using My Digital Studio.

I printed them at home on Whisper White card stock...4 to a page, then cut them and mounted them on 1/4 sheet of Pumpkin Pie. I used the From the Crypt stamp brush set and also printed out a sheet of the spiders on 1" circles of Cast A Spell DSP which I also used on the rest of the invite along with a few elements from the Pick Your Poison Designer Kit. I punched out the spider circles and added a black rhinestone to each one (along with the little bat) and then adhered them to a 1-1/4" black circle, and attached them to my card using a dimensional. Of course I stamped my envelopes to match. I love having my favorite Halloween papers still available to me by using them in MDS! Here's a little closer look...
I made up prize buckets containing a scary movie on DVD, popcorn & candy to give to the winners of our costume contest. I inserted a hand stamped pick into each one with the category...best couple, scariest & funniest.

Like I said, we really get into decorating...so that includes our pumpkin carvings.


The past couple years I've dressed as something creepy (last year I was even a creepy man...Alice Cooper) so this year I wanted to dress in something pretty, so this is what I came up with.
Notice the arrow going thru my hubby's hat! lol Not too much to his costume, but he liked it that way. I got the pieces for mine at the Salvation Army and added details using paint, beads & feathers (which I already had in my stash) so I spent less than $10 on mine...not including the moccasins, which I already had. Check out the incredibly beautiful face painting my friend Amy had done for her Day of the Dead costume...she looked amazing!

And now, here's a treat for you....

Just stop by my SU! website between now and Nov 5th and you download three digital downloads for FREE! PLUS the digital kits are 50% off! If you don't already have My Digital Studio, you can download the FREE trial version...so what are you waiting for!?


Tuesday, October 30, 2012

Christmas Frame & Coordinating Card

Today I have the last project of the month from Craft Project Central...this on is a *bonus* project and was designed by Terry.


Make a framed tree with a banner to mark the year for your home-for-the-holidays, or for a one-of-a-kind gift! The card perfectly complements the frame if you’re giving it as a gift, or make a bunch and send them out as your card this year! This project makes a great holiday class or club project too!

To get the instructions for Terry’s bonus project, just subscribe to October and meet one of the bonus project requirements of subscribing to two or months in a row, putting the Craft Project Central badge on your blog, or referring a friend and when they subscribe, letting us know.

Friday, October 26, 2012

Grocery List Coupon Organizer

Here is another great project from Craft Project Central. Not only is this pretty, but it's useful as well This project comes to you designed by Niki!


Being organized is a good thing! Did you know it can also save you time and money? Yes, when grocery shopping, if you take a grocery list along with you, you are or likely to stay on track and on budget. And, it doesn’t hurt to be stylish while doing so! This project helps you do all of that. The folder contains a notepad and pockets for your coupons and grocery list. You’ll also make some cute butterfly paper clips and a matching pen! Makes a quick and easy class or club project as well!

To get the instructions for Niki’s project, just subscribe to October!

Have a great weekend!

Wednesday, October 24, 2012

Fall Candle Holder & Dinner Party Ensemble

Another beautiful project for you from Craft Project Central. This one is designed by Regina.


This project has everything you need for a special dinner occasion! From the invitation to the centerpiece! The only thing left to your imagination and ingenuity is the menu. Of particular note is the beautiful candle holder, which features Comfort Cafe designer fabric. Your guests are sure to be impressed with your craftiness upon seeing this beautiful ensemble!

To get the instructions for Regina’s project, plus all others for the month,  just subscribe to October.

Monday, October 22, 2012

Fall Accordion File Folder Card Set

Sharing another beautiful fall inspired project with you today from Craft Project Central. This on is created by Christy.


Celebrate Fall by making this Autumn-inspired card set! The beautiful Fall colors also make for a great set of masculine cards! The set includes eight cards, eight stamped envelopes, and a coordinating card holder. This project is a great gift and also makes a great Fall Card class!

To get the instructions for Christy’s project (plus many more!), just subscribe to October.

Thursday, October 18, 2012

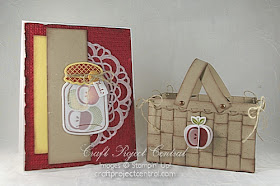
Fall Basket & Apple Card

Here is another fun fall project for you from Craft Project Central! This one is designed by Monika.


Fall is here and apples are everywhere! Make this weaved basket for those yummy apple treats everyone loves this time of year! Perfect for a small party treat or a fun class project! To get the instructions for Monika’s project, just subscribe to October!

Reminder: You still have time to enter for my FREE month subcription to Craft Project Central! All you need to do is leave me a comment on this post.

Tuesday, October 16, 2012

Halloween Treat & Frame

Yesterday I shared the project I created for Craft Project Central with you. There is still time to enter in my drawing for a month subscription to Craft Project Central...just post a comment on this post by Friday. I'll draw one lucky winner on Friday afternoon...good luck!
Here's a couple fun projects for those little ghost & goblins! This Halloween frame will be perfect to hold your favorite Halloween photo, and who doesn't love a little chocolate? The Toxic Treat set decorates each side of the Milk Carton Die box perfectly.

I used...

Stamps: Toxic Treats
Ink: Basic Black & Versamark (the Trick or Treat on frame is embossed in black)
Card stock: Pumpkin Pie, Lucky Limeade, Rich Razzleberry, Basic Black & Brights DSP Stack
Accessories: Big Shot, Milk Carton Die, Oval Accents Bigz Die, 3" Circle Die, Brights Glimmer Brads & Black & 1/2" Striped Satin Ribbon

You may recognize the chipboard frame as part of the autumn set I created in my last post. If you would like my step by step instructions on how to create the frame just subscribe to October. As you can see, it is easy to make for any season or occasion! Now...scroll down & comment so you can win a subscription!