Creations by Lynn Weiss ~ Independent Stampin' Up! Demonstrator

ENJOY ~ INSPIRE ~ CREATE ~ SHARE


Showing posts with label Hostess Club. Show all posts

Wednesday, January 21, 2009

Love you

Sorry I've been MIA for the past several days. You probably just figured I was too busy looking at the new Spring~Summer catalog to take out time to post. I wish that was the case! I guess you could say my luck ran out as far as not catching the flu bug that the rest of my family has been passing around since just after Christmas. This morning I'm feeling pretty good, so I thought I'd finally share the other projects we did at stamp club on Friday.

This card was made with two of my all-time favorite backgrounds ever...Floral and Canvas. Unfortunately, as of Monday they were both retired. Hopefully you already have them in your collection...I know I'll never give these babies up!

The image from Dream du Jour was stamped in VersaMark and embossed with Black EP. Classic inks and the aqua painter were used to watercolor the image. The little envelope was created using the Big Shot and the SU! exclusive Scallop Envelope die. It holds an extra little note for the recipient. In this case it will be sent to my Mom for Valentine's Day.

Colors used: Real Red, Elegant Eggplant & Pink Pirouette.

For a final project everyone created this magnetic acrylic calendar using Eastern Blooms and the DSP and ribbon of their choice.

My sample uses: Green Tea paper (retired), Perfect Plum card stock and ink along with Celery grosgrain ribbon.

Saturday, January 17, 2009

Bright Flight of the Butterfly

Last night was my last hostess club meeting for a while. I'm sure going to miss seeing these ladies every month! We had fun stamping, eating the delicious nacho bar our January hostess Teresa set up for us, and looking through the new catalog. It was fun looking and commenting about the new goodies with others who care...for some reason the hubby and sons just don't seem interested. Imagine that? One of the cards we did last night was this one using the Flight of the Butterfly.

The women were sooo incredibly thrilled to use the stamp-a-ma-jig so many times on this card! (in case you missed it...I'm being sarcastic, hehehe) I've found that most don't really like using the stamp-a-ma-jig, but once you get used to it it's hard to live without it. I suppose you could eyeball the layers to the butterfly, but that never works out well for me. OK, I admit it...it's because I'm a perfectionist, and if it doesn't line up it just bugs me.

Stamps: Flight of the Butterfly, Cute & Curly
Card stock: Pacific Point, Certainly Celery, Rose Red & whisper White
Ink: Pacific Point, Certainly Celery, Rose Red & White Craft
Accessories: Scallop edge & Curly Label punches, White Taffeta ribbon, mat pack, white gel pen, adhesive backed rhinestones and of course...the Stamp-a-ma-jig!

We did another card and an acrylic calendar, but I didn't get a chance to photograph those...so I'll post those next time. Have a great weekend!

Saturday, December 13, 2008

Christmas Hostess Club

Last night was my December Hostess Club meeting. I prepared some festive non-card holiday projects for the group. (I guess I couldn't bear doing another Christmas card this week!) You may remember the Thanksgiving frame I shared here a couple weeks ago? We did a Christmas version of that using the Ski Slope papers and Little Felt Flurries.
This time instead of using the On Board Book Basics, I used the Long Board Chip Board made for use with the Big Shot. (I found out after the fact that the Book Basics are a little thicker and not recommended for use on the Big Shot.) I certainly don't want to hurt my beloved Big Shot or my Top Note die! I didn't take a photo of the back this time, but if you check out the Thanksgiving version is shows the pocket for the photo and the stand created from chipboard using one of the Sizzix tag dies.


We also created this darling little ornament using the penguin from Punch Pals.
This is one of those little favor tins with the clear lid. Using White Stazon, we stamped the lid with the snowflake from Season of Friendship. A piece of Ski Slope paper was cut into a circle using the Coluzzle and adhered to inside of tin with Tombo Multi Adhesive. The penguin was stamped on Shimmery White, watercolored, cut out and adhered to the back with some stacked pop dots for extra dimension. Iridescent Buffalo Snow and some Clear Micro Beads were added to the inside, the then tin was sealed with some Sticky Strip around the outside of the lid. This also held the Baha Breeze Striped ribbon in place, and it was knotted at the top. Silver cord inserted before the ribbon was knotted acts as the hanger.

I made these Christmas boxes using the Scallop Envelope Bigz Die for each of my clubbers.
The box is made by attaching 4 of the scallop envelopes together. I wheeled each one with the Bold Snowflake jumbo wheel and finished them off with the cute images from the Deer Friends Level 2 Hostess set. Here's a closer look:
Inside the box was a snowflake ornament created with the large Snowflake die and 4" square coasters. Each one was embossed and finished with a Felt Flurry and rhinestone brad. Of course there was also chocolate in the boxes as well!

Have a wonderful day! Looks like we're in for another c-c-cooold one here.

Sunday, November 16, 2008

Two Fall Themed Pages

At stamp club on Friday the group got to choose between two different fall themed scrapbook pages. They both used the same layout and colors, just different stamp sets and embellishments. The first layout, shown below, used the beautiful set Harvest Home along with it's coordinating wheel Fall Harvest. This one is perfect for Thanksgiving photos.
My inspiration for this layout came from page 111 of the Idea Book & Catalog. The layout there used Bella Blossoms and totally different colors, but I was able to make it work with the stamps and accessories I wanted to use. Do you like the buttons on the bottom left? Here's a closer look:

I used my new Buttons Sizzlet die (available from SU!) and my Big Shot to make the buttons. To add extra dimension, each button was embossed with Glassy Glaze. I think this die is just the cutest and I know I'll be using it a lot - now I can have as many buttons as I need in whatever color I want!
The other layout they could choose was done with the Season of Friendship set. This one was a little simpler, in that there wasn't any watercoloring, but the trade off was that it did require some intricate cutting around the tree.
The oak leaf from Lovely As A Tree was stamped on the background of the Artichoke & Mustard panels instead of the Fall Harvest wheel. Three die cut oak leaves cut using the Big Shot replaced the buttons. (not sure of the name of the oak leaf die) The title was cut using a set of Sizzlets called Fruit Smoothie. The strip down the center was done using the same leaf stamp from Harvest Home used on the first layout, but the leaves were omitted by inking the vine only with the Chocolate Chip marker. Then the leaves that were used for the tree were added to the vine for a coordinating look.

So, which layout would you have chosen? My group was evenly divided - half chose the Harvest Home layout and the other half chose the Season of Friendship. Thanks for stopping by...enjoy your day!

Saturday, November 15, 2008

Cracked Harvest Home

Last night my Hostess Club met for the month of November. Everyone had fun working on Fall themed projects. Our hostess Cheri brought some delicious food and was most generous in loaning me her Harvest Home set to design the club projects. Thanks Cheri! This is such a beautiful set...so much fun to watercolor, I'm going to have to add this one to my collection.
We used the cracked glass technique on this card. If you haven't tried it before, you should give it a try...it's a really fun technique. First, you'll want to color your image. This one was stamped with Black Stazon and colored using re-inkers and the aquapainter. After it is dry, cover the whole image in Versamark, then emboss with Glassy Glaze EP. Apply 2-3 layers of the Glassy Glaze by repeating the last 2 steps. Next, stick the embossed image in the freezer for approx 5 minutes. Then, take it out and quickly crack the glaze by gently bending the image. Once the heat from your hands warms the piece, it will be difficult to crack, so simply throw it back in the freezer and rework it after it gets cold. To emphasize the crackled effect even more, you can sponge on some ink to settle into the cracks. (I didn't do that on this particular piece)Here's a closer look:

The Really Rust background was done using the Fall Harvest wheel inked in Close To Cocoa. The little leaves were from the ivy image included in the Harvest Home set. They were water colored, cut out and then glassy glaze was applied to them just like we did for the cracked glass, only we just used one coat and didn't crack them. This gives them a hardened epoxy-like look.

Other supplies used on this card: Creamy Caramel, Chocolate Chip & Very Vanilla card stock, Creamy Caramel & Chocolate Chip ink, Vintage brads and Taupe grosgrain ribbon (retired)

The group also had their choice of two different Fall themed scrapbook pages. One used the Harvest Home set and the other used Season of Friendship. Check back tomorrow to see the pages we did.

Have a great weekend!

Saturday, October 25, 2008

A Wicked Good Stamp Club

Last night my group got together for our October Hostess Club. It was a much needed, fun night for me...with everything that has been going on here lately. Michelle, our hostess for the evening, brought some hot spiced cider spiked with Buttershots Schnapps and some other delicious goodies. With a few mugs full of that cider and such good company I was definitely cheered up! On to the projects we made...

This card is cute from the outside, but it's the inside that makes it really spectacular spooktacular!
Stamps: House of Haunts, Batty for You, Canvas background & Haunting Jumbo Wheel
Card stock: Glossy White, Basic Black, Pumpkin Pie, Kiwi Kiss, Perfect Plum & Ghostly Greetings DP
Ink: Black Stazon, Pumpkin Pie, various inks for sponging
Accessories: Kiwi Kiss satin ribbon, Scallop, 1-3/8", 1-1/4" & 1" circle punches, coluzzle
Techniques: Sponging, Masking, Spiral Pop Up Card. (I found the complete instructions on how to make this type of card on SCS. )

Continuing on with our Halloween theme, we also altered some tins that I had picked up a while back at Michael's. We used the Ghostly Greetings Double-sided Designer Papers along with House of Haunts & Batty for You stamp sets.

We filled them with a mixture of candy corn & peanut M&M's and for an added surprise... a big black spider on top of the candy.

After finishing the candy, you'll see the stamped greeting on the bottom.

Along with these Halloween projects, we also made the Crazy For Cupcakes card shown in my last post.

On another note, I was excited to hear that a card I sent to Stampin' Up! for a monthly contest made it to Stampers Showcase yesterday. That is pretty cool! (not as cool as actually winning the contest...but still pretty cool!;-)You may remember this card that I recently made for a card swap...that's the card that was on Stampers Showcase.

Blog hop on over to my friend Denise's blog - Stampin With Denise...she is giving away some fabulous blog candy to celebrate her 1 year blogaversary.

Thanks for stopping by...have a wicked good weekend!

Sunday, September 21, 2008

Inspired by Nature Page

Last month on club night I took a photo of each one of the girls out in my garden where the Cone Flowers and Black Eyed Susans were blooming. I told them it would be used for our September club project. As always, the month went flying by, and this past Friday was September stamp club night! Here is the project I had ready for them:
They each got a full sized portrait of themselves along with the group shot... they could then decide how to use them. They had a choice of 2 different color schemes, either the Mellow Moss with So Saffron & the Haiku designer paper as shown above or Mellow Moss with Perfect Plum and the Perfect Plum prints as shown below. They could use the "live with passion" stamp that came with the Inspired by Nature set or the "Time spent with friends..." stamp from the retired Level 3 hostess set Time Well Spent. The Mellow Moss background was stamped with the cone flowers inked in Versa mark and then we used the poppin' pastels technique to color them. Next the grass was added using Mellow Moss ink. At the top of the page the swirl from Baroque Motifs was added and then over the top of that I used the Sanded background stamp to give the page some texture.

This is the first club meeting where my "Big Shot" could join us...so of course I had to use the Top Note die cut for the journaling box. I was a little concerned that perhaps the group would have "Big Shot envy"(I've heard of other cases of this! ;-), but I shouldn't have worried...they were CRAZY for my Big Shot so that made me happy! Actually, my hostess club groups always make me feel happy and appreciated. I think they really liked the projects I had for them this time because I was getting a big head with all the nice compliments they were giving me.

Before I started with Stampin' Up! I only knew 2 of these ladies - it was through them that I have had the pleasure of meeting the rest of our group. I'm now lucky to consider them as my friends. I think that has been the most rewarding part of being with Stampin' Up!...meeting so many nice people who share a common interest.

I also did a second page to include the entire group. Here's my completed 2 page layout:
See guys...I told you that you all would be on the page and not just Julie! (they thought I was playing favorites when they saw my sample) I will also do a 2nd page for the plum layout that will include photos of the flowers I've taken in my garden this summer...because I am "inspired by nature". ;-)

Thanks for visiting me today...hope you have an inspiring day!

Saturday, September 20, 2008

Sparkley Scrap Bucket

Isn't this the cutest garbage can you've ever seen? This is one of the projects my stamp club made last night. I've had a little altered bucket similar to this on my stamping table for scraps for a while now, and it has always gotten a lot of comments. One club member in particular has even threatened that she was going to take it home when I'm not looking. So...I had them all make one so I could quit worrying about mine coming up missing. ;-) After seeing Pam Morgan's great demo using Heat & Stick Powder, Fine Cosmo Glitter & chipboard on the SU! website, I've been dying to try it. The Heat & Stick Powder & glitter came in my last order, and I still had some pieces of chipboard left from the On Board Blossoms & Basics so that's what I used.

I bought the tin buckets from the Target's Dollar Spot and drilled a hole in the center. The glittery flowers are attached with one of the pretty brads from the Styled Silver HPH set. Then we just tied different ribbons on the handle. I had 3 different colored buckets for them to choose from and the flowers were different shapes and sizes, so it was fun to see how they all turned out.

This weeks challenge over at the Stamp Something blog is to "Embellish Something". I think this qualifies. :-) I'll be back tomorrow to show you the other project we did last night.

I started to put the glitter & chipboard away and decided while it was all out I may as well add a little glitz and glamour to another bucket and this metal container I keep my paper plates in. I think I'll also add some rub ons to go around the large one, but for now this is good. I better put away that glitter now before I go crazy and start putting it on everything!

Saturday, August 16, 2008

Stamp Club Projects

Thursday night was the start of another round of Stamp Club. We welcomed back Julie to the group along with one new-comer - her SIL Teresa. What a nice, fun group of women! As each one arrived, I took a photo of them that we will use for next months project. Later on in the evening we got together for this group shot...glad I remembered to do that before it was totally dark! Julie was out first hostess and she brought chocolate fondue with fresh fruit for everyone...YUM!

Everyone loved the new catalog and we had fun discussing what our favorite new sets and papers are. The projects I prepared used the new In Colors and a couple sets I pre-ordered, since my new catalog order has yet to arrive. (that will be here next week! woo hoo!)

I got the idea to create the flower on the card below from this blog. Isn't it cool? You use the 5 Petal flower punch to create the flower. Basically all you do is punch out 7 flowers. Sponge on a darker shade of ink - in this case I used Apricot Appeal & Cameo Coral on the Pink Pirouette punched flowers. You want to make the center of the flowers more shaded and try to leave the tips less inked. Put one flower aside and the proceed to cut the other 6 into individual petal shapes. Then, using a glue pen you adhere the petals in between each petal of the flower and keep layering as you go. You can make any size you want depending how many layers you add to the original punch out. There is a tutorial on the blog linked above, so check that out for much better instructions than I just gave! lol For the leaves, I ran Celery & Artichoke card stock through the paper crimper, punched out both small & large ovals and then cut the end into a point to form a leaf.

Stamps: Floral background, Fresh Cuts
Ink: Certainly Celery, Cameo coral & Apricot Appeal
Card stock: Certainly Celery, Basic Black, Pink Pirouette, Always Artichoke & Cameo Coral
Accessories: Pretties kit, 5 Petal Flower, Flower Bouquet and oval punches

The next card used the new level 2 Hostess set Serene Spring. I've been having fun making lots of cards with this set already. This card used the new scallop border punch to create ric-rac.


Stamps: Serene Spring, Boho Backgrounds
Ink: Baja Blue & various others to watercolor
Card stock: Apricot Appeal, Baja Blue, Tangerine Tango & Certainly Celery
Accessories: Mat pack, Scalloped border punch, aqua painter

My plan was to use every one of the new In Colors for the projects, so I had to come up with one more project. Since the first 2 cards were a bit complicated, we did a quick & easy card. I got the inspiration for this card from one of the cards I received in my new catalog preview card swap. (you can see it in the slide show on my last post) JoAnne created that card using Wow Flowers, but since I don't have that set, I used Big Flowers.

Stamps: Big Flowers, Heard From the Heart
Ink: Kiwi Kiss, Riding Hood Red, Pacific Point, VersaMark
Card stock: Kiwi Kiss, Riding Hood Red, Pacific Point, Whisper white
Accessories: Scallop border, Crop-o-dile (used for dry embossed circles) White embossing powder

Julie got to pick a stamp from my goodie basket and everyone got to take a sampler pack of the In Colors home to play with. Now they have to wait until next month to see what we are going to do with their photo. ;-)

Friday, June 20, 2008

Last Stamp Club Meeting

Wow! The past 6 months sure went flying by! I cannot believe that last night was already the last stamp club meeting! I hope everyone has had as much fun coming to these club nights as I have had holding them. I'm lucky to have had such a great group of women! I will be starting up another group of 6 in August...let me know ASAP if you are interested in joining, and I'll fill you in on all the details.

Last night I prepared several projects, which everyone completed in between chit chat, laughs, good food and wine, provided by our hostess Tami. Thanks Tami! Here's a look at the projects we did.
I'll describe each one a bit because unfortunately one member of our group couldn't make it last night. We missed you Miriam! I stamped your projects, but you'll still have to assemble...that is if Rach gives them up! hehehe

I think everyone's favorite project of the night was the glass coaster. I found them at Target in their Dollar Spot a month or two ago. Unfortunately even after searching several stores I wasn't able to get more than 4 packs, so everyone had to choose either the butterfly or the bird from my favorite retiring set - Touch of Nature.
I photographed them here with the box in case others want to try and find them at your local Target. They come 2 to a box. All you need to do is stamp your image and insert it inside the pocket on the back. That way if you get sick of a design you can swap it out...or even change for the season. To add extra detail we also stamped the front with White Stazon. The bird coaster uses the fern image from the TON set. The butterfly has the swirl from Baroque Motifs. I also promised a masculine card so we used my favorite masculine set at the moment- For Father along with a couple retiring sets- Flannel Plaid and Trimtastic. Color combo is: Bravo Burgundy, Creamy Caramel, Always Artichoke & Chocolate Chip with Antique Brass Hodge Podge Hardware.
This is a trio of note cards using the new Fresh Cuts set with the die cut note cards. Everyone got to select their favorite color combo and make one note card. To add a little extra detail to these otherwise quick & easy cards, I added a little faux stitching on the layer behind the die cut opening. That layer was then attached on the inside using dimensionals to show off the die cut flower.

Last but not least, we did this adorable little boho bookmark. This cute project uses a variety of punches: Scallop, 1- 1/4" circle, Ticket Corner & Boho Blossoms. The scallop topper is held in place with a bit of adhesive at the top and the Jumbo Pewter Eyelet, this allows the scallop to slip over the page to hold your place. I didn't come up with this idea, but saw a tutorial on another blog...check it out here. Thanks for sharing this project Mary Jo!

Thanks for stopping by! Have a great weekend!

Sunday, May 18, 2008

Seed Pocket and Cutie Pie Pinwheel

Friday night was my Hostess Stamp Club night...and as always we had a fun evening of visiting and stamping. I can't believe we only have one more meeting left!


Everyone made this pocket card that holds a pack of Morning Glory seeds. They are attached to a piece of card stock with a single brad for easy removal. The card is stamped with the sentiment under the seed packet.

This pocket card was made using the Wild Wasabi textured card stock from last months promo. I just cut it down to 4-1/4 x 11. It is scored at 5- 1/2 and again at 1- 1/2" for the folded down flap. I used the closest SU! colors to match the seed packet - Brocade Blue, Barely Banana & Almost Amethyst Prints. The flower was water colored, but I used my pastels to create the soft blended background.

Here's what the card looks like when the seed card is inserted inside the pocket:

The other card we did was a spinner card done at our May Hostess, Miriam's request. She just loved a sample I had done last spring using Polka Dots & Paisley with the matching Petals & Paisleys paper. Spinner cards are fun to make...and even more fun to play with! The cute little pinwheel is a great way to showcase both sides of the designer papers too.


The image on the card spins after attaching it to two pennies with pop dots sandwiched between them. These are then put inside a track created by the window word punch. For a great tutorial showing exactly how to create a spinner card click here. Keep in mind this tutorial was created before the Window Word punch...so now it's even easier to make one of these cute cards!


To create the pinwheel I started with a 2" square of Cutie Pie designer paper. I cut it at a diagonal on each corner stopping before I hit the center mark. Then fold every other corner into the center holding it in place with a bit of mono multi adhesive. A punched flower and a brad finish it off and also helps to hold it altogether securely.

Stamps: Boho Backgrounds & Big Bold Birthday

Card stock: Bashful blue, So Saffron & Cutie Pie DP

Ink: So Saffron & Purely Pomegranate

Accessories: Rich Regal brads, Stamp-a-ma-jig, Spring Flower Punch (retired) & window Word Punch, pop dots.

Thanks for stopping by....have a wonderful day!

Saturday, April 12, 2008

It's All Good!


Last night was stamp club night, and like always we had fun visiting, eating & stampin'! Hostess of the month - Kim, brought a super yummy dessert called Lemon Berry Trifle Thanks Kim!


I prepared a scrapbook page and a pocket card for everyone to make. The scrapbook page used a combination of different sets to create a fun and happy page. I have been wanting to use It's All Good along with Pick A Petal for a scrapbook page so that was my inspiration. Normally I have photos I want to use and that's where I decide my color scheme, but since I wasn't sure which photos I was going to use I took my color cue from the designer paper I chose - the Flowers For You assortment. I figured these papers would work well with the bold images from the Pick A Petal set and the other assorted flower stamps I planned to use. See the striped "ribbon" down the side? This was created by scoring and folding over the double-sided paper.
Since Live Your Dreams is one of my favorite new stamps sets, of course I had to use the cute line stamp in that set to create a journaling block! First I stamped the Live, Laugh & Love stamp in the bottom corner, masked it with a post-it note and used my Stamp-a-ma-jig to add the lines so they didn't end up crooked. Then I used my markers to ink up the cute little line of flowers at the top - also from the Live Your Dream set.

I gave everyone a choice of which piece of patterned paper they would like to use for their page and what color they would like for the background. Each one picked a different patterned piece so the finished pages all looked unique. It was fun for me to see how each page turned out looking so different just with those little changes. They all did a great job, don't you think?!

This is Kim and her Sister-in-law Jill.


Here's Rachel & Miriam


Rachel, please note how nice I am...I used the good photo and not the one I threatened you with! (Don't worry, I didn't delete it...it may come in handy for future use! ;^) Both Cheri and Tami were absent - we missed you guys! and somehow Michelle managed to avoid the camera...watch out next time you three!


Stamps: Pick a Petal, It's All Good, Live Your Dream, Make It Count (hostess set), Always (I used just one flower...see if you can spot it) & the Spunky Spots jumbo wheel
Ink: Regal Rose, Certainly Celery, Tempting Turquoise (stamped off once) Lavender Lace & White Craft
Card stock: Flowers For You DP, Regal Rose, Certainly Celery, Lavender Lace & Whisper White
Accessories: Mat Pack, White gel pen, various Circle punches, Photo Corner punch, Stamp-a-Ma-Jig

The pocket card was created using the Wild Wasabi pre-scored card stock from the Wild For Wasabi promotion. I had to trim it down a bit so that the finished card would fit in a standard envelope. I thought this would be a cute little card to give someone next time they ask for a recipe. Or maybe give as a little thank you card to someone who hosted a potluck type party...you could include the recipe for the dish you brought to pass.

Can you tell I'm just loving the Live Your Dream stamp set and the matching Afternoon Tea papers? I can't stop reaching for them every time I stamp lately. The pullout is a recipe card using From the Kitchen Of stamp set and the same color scheme I used for the cards in my recipe box set.


I had fun last night...I hope you all did as well.

Friday, March 14, 2008

Easter Whimsy

I've been so busy with other things this past week I haven't had much time to stamp, post here or even browse other blogs. On my last post here I mentioned my Mother-in-law was in the hospital. Thank you to everyone who had well wishes for her. She is now out of the hospital and doing much better!


Last night my Hostess Club got together, so I'll share the projects I prepared for the group. Hope you don't mind another Garden Whimsy card! This set is just so perfect for Spring, and since I don't have any current Easter sets I thought these tulips would work great for our Easter themed projects. The Flowers For You designer papers just screams spring to me also, so I used the lavender sheet on this card. My favorite part of this card is the 3-D butterfly. It was stamped twice - one image was punched out using the 1-3/8" circle punch being careful to include the antenna, the second image was cut out - except for the antenna and then just the body was adhered in place using the 2-way glue pen so that the wings are free.


The other project we did was this cute little basket with Dove chocolates. I figured I couldn't go wrong if chocolate was involved! The basket was created using an 8-1/2 square of Mellow Moss card stock:

  • score at 5-1/2 on each side
  • cut each corner off - and you'll have a cross shape remaining
  • score each side again at 1" to create the fold down flap
  • use corner rounder punch to create scallop edge on flap
  • wheel with the Whimsy jumbo wheel
  • Stamp the flap section with Canvas background
  • handle = 7" x 3/4" strip stamped with Trimtastic
  • scalloped embellishment on front= So Many Scallops stamped on Lavender Lace + Seeing Spots stamped on Mellow Moss punched with 1 1/4" circle + Pretty In Pink DP punched with 3/4" circle with So Saffron brad in center.

My first attempt at a basket was this one shown at right using the cute little box shown on page 11 in the SAB catalog. I got the pattern from the SU! website which was basically a template for the tiny take out box with the top trimmed off. However, scoring and folding this was kind of tedious and in the end I had to really fool with it to get it assembled properly. The shape is really cute, but you do need a little patience for this one, that's why I opted for the easier version above for our March stamp club project. If you're up for the challenge, email me for the template. (I couldn't figure out how to post it here)

Just a reminder...only a few more days left for the Sale-A-Bration promo...last day for orders is March 17th.

Enjoy your weekend!

Saturday, February 23, 2008

Friendship Whimsy

Last night my Hostess Club got together for a fun night of stamping. It was Rachel's turn as hostess and she brought such yummy snacks and Cheri brought a nice bottle of wine...thanks you two!Unfortunately, two members of the group were sick and had to miss out...hope you are feeling better today Michelle & Kim! I have your projects stamped and ready for you to assemble.

We made this cute stand up pop up card. It folds flat to fit in an evelope for mailing. We used the Friendship Blooms SAB set and the Spunky Spots jumbo wheel. The big flower was embossed in white EP and then watercolored.

I found the instructions for this pop up card here. I did alter the measurements a bit so that it fit in a standard envelope. The original project called for the base to be 11"x 4-1/2" and I changed it to 11" x 4-1/4. This also allows you to get two cards from one peice of card stock.

Our next project uses the SAB sets Birthday Whimsy and So Many Scallops along with the Whimsy jumbo wheel. To create the scalloped edge on the Real Red textured cardstock we used the 3/16" corner rounder. the red zig-zag ribbon can be found in the Jersey Ribbon Originals pack. The Soft Sky patterned paper is from the designer prints pack.

Enjoy your weekend!

Monday, January 21, 2008

Valentine's Day Projects at Hostess Club

Friday night was the start of another round of my hostess club. Since we won't be meeting in February until after Valentines Day, I designed this months projects with a Valentine theme. The first project was a masculine Valentine using the Always stamp set. A slight variation to the Joseph's Coat technique was used to create this card. If you've never tried this technique you should give it a try:


  1. Using a spectrum pad* brayer a piece of glossy white card stock with color. *This is where I deviated a bit from the technique - I randomly sponged on the colors I wanted instead of using a spectrum pad and brayer. Allow card stock to dry.
  2. Rub the Embossing Buddy over the glossy card stock, then randomly stamp your images with Versamark ink. (In this case I just stamped the one heart image.)
  3. Emboss with Clear Embossing Powder and allow to cool.
  4. Brayer over the top of the entire glossy card stock with Basic Black ink until evenly coated.
  5. Wipe excess ink from stamped images using a paper towel.
I really love the new Always stamp set. The heart looks so pretty embossed! The sentiments included with this set are great too, as well as the little background pieces. However, it is the bird in the set that really caught my eye...he is stamped on the inside of this card. I look forward to making more projects using this set with the bird front and center!

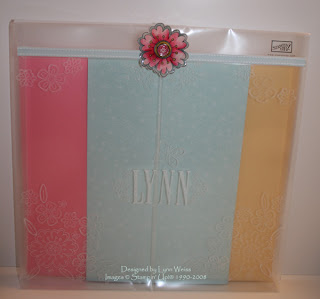
The other project I had the group do was an acetate card using the Happy Heart Day set. The acetate was stamped on the front panel with White Stazon ink. Then each layer is matted and adhered to a different panel of the acetate by applying double stick tape behind the previous smaller mat. This way all the adhesive is hidden by another layer and when the card is closed you see each layer of matting except the inside where your greeting is written. For example, my mouse image along with the Bashful Blue mat was adhered to the front (outside) of the card. I then opened the card, directly behind my blue mat I applied my double stick tape to the acetate, then I centered my Rose Red mat behind that, and proceeded to work my way back until each layer was properly centered and adhered to the acetate. I just love the look of these acetate cards ~ I'm glad I finally found the time to make one!I always give the hostess of the month a hand stamped gift. For this round of stamp club I decided to try something a bit different. I ordered the 12x12 craft keepers and everyone got to personalize one using white stazon & ribbon. To finish off this project, a fun embellishment was added to the flap of the craft keeper. The large flower from Time Well Spent was water colored on whisper white card stock and then embossed with several coats of Glassy Glaze enamel. This created a hard acrylic coating over the flower image. Then using a Build a Brad for the center it was attached to the flap. Here's a close up look:

When completed, this project is not only cute it is also useful!

January is a big birthday month in our family. I've been busy creating birthday cards. Tomorrow I will share some of those projects. I hope wherever you are you are staying warm...it is soooo cold here right now!