This first card is a quick & easy card that I featured at a workshop a while back.



This first card is a quick & easy card that I featured at a workshop a while back.
With October only a few days away, I thought it was about time I shared something Halloweeny! Here's a cute, but simple card I created to demo for a workshop I had last week.

Here are a few projects using the Ice Cream Parlor Papers and the Bliss stamp set that I forgot to show you. The Bliss cone was a little hostess gift made with the Petal Cone Die. I used the stamps from Bliss to add a pretty design to the Melon Mambo card stock. It's tied with ribbon from the Ice Cream Parlor Ribbon & Button pack.


I hope you had a nice weekend. I spent most of my weekend working on putting my house back together after getting new flooring in our dining/living room area. LOTS of furniture and stuff to move! I'm sure glad it's done and things are mostly back to normal...but it was worth the disruption, as I love the way it looks. :-) Since I didn't get to do any stamping, here's an easy card that was a make & take at one of my recent workshops. With the Crazy for Cupcakes set and matching cupcakes wheel, it's easy to create cute cards in a snap! I took it a step further by doing a little paper piecing using one of the striped papers from the Tea Party paper pack and finishing off my card with Crystal Effects on the icing and candle.
Stamps: Crazy for Cupcakes, Cupcakes wheel
Card stock: Whisper White, Regal Rose, Certainly Celery, So Saffron, Tea Party DSP
Ink: Basic Gray, Regal Rose, Certainly Celery, So Saffron
Accessories: Big Shot, Lots of Labels Sizzlets, Large Oval punch, Aqua Painter, Soft Subtle brads, So Saffron grosgrain (SAB ribbon bundle), & Crystal Effects
Have a sweet day!
Wow, this week sure has flown by! I've been pretty busy with a couple home improvement projects around here, plus I've been designing some cards for an upcoming card class this weekend so I haven't had much time for blogging. After my card class I'll have lots of new things to show you. ;-)
Today I'm sharing a couple simple cards that were one of the make & takes at a workshop I did earlier this week. The guests had their choice of using either the tree or the floral design. Both of these images are so pretty it would be hard to pick. The workshop guests were pretty much evenly split on the tree vs the floral design.

Here's the tree card:
 Stamps: Thoughts and Prayers
Card stock: Mellow Moss, Perfect Plum, Whisper White & Perfect Plum DP
Ink: Mellow Moss & Perfect Plum Markers: Chocolate chip, Perfect Plum & Always Artichoke
Accessories: Moss grosgrain ribbon & Ticket Corner Punch
Have a great weekend!
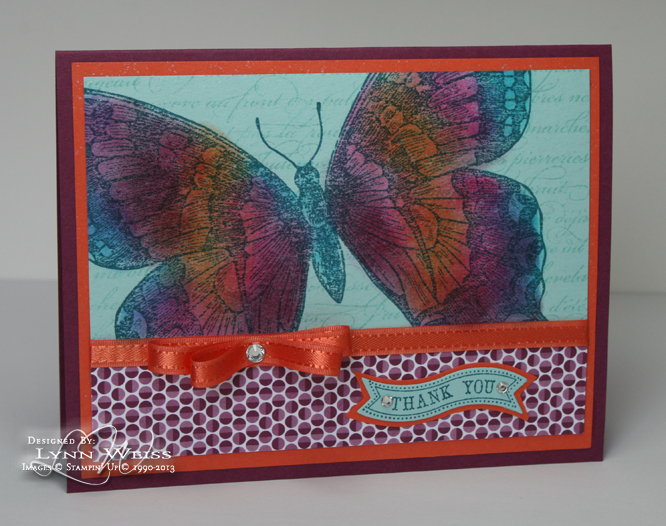
I had a busy weekend and then a workshop last night so I haven't got around to posting much lately. This is one of the cards that everyone made at the workshop last night. I kept it fairly simple since a large group was making the card. But since they were all experienced stampers and like to try different techniques, we did the kissing or faux shaving cream technique on the butterfly. My sample here shows the butterfly with the kissing technique. Simply ink your stamp in the lightest color, in this case Amethyst, then ink your wheel in a darker ink - I used Lovely Lilac, roll the wheel right over your inked stamp to create the "kissed" image, or for a marbled looking image, twist as you roll, this will create the faux shaving cream effect. (I forgot to take a pic of that...I'll try to do that later and add it)
Stamps: Simple Friendship, Sincere Salutations & Always in Bloom wheel
Card stock: Almost Amethyst, Pink Pirouette, Certainly Celery and Tea Party DP
Ink: Almost Amethyst, Pink Pirouette & Lovely Lilac
Accessories: Simple Flower Embosslit, Celery ribbon (SAB)& SS brads
I must say that my hostesses last night really spoiled everyone...me included! They served up a wonderful meal starting with creamy chicken knoki soup topped with bacon, followed by Chicken Marsala over pasta. For desert they made delicious chocolate crepes with strawberry sauce, drizzled in chocolate. I'm telling you...my mouth is watering just thinking about it! Plus they made the most adorable file folders as a party favor for everyone. (I'll take a pic and post later.) It was awesome! Thanks again Minnie & Becky...you rock!!!
This is the make & take project everyone made at my workshop on Friday. I used the large Sizzix Snowflake die along with the Snow Swirled set to create this beautiful, yet simple card. I just love that large snowflake die cut! Stamps: Snow Swirled & Heard From the Heart
Card stock: Pacific Point, Baja Blue & Whisper White
Ink: Pacific Point & Baja Blue
Accessories: Big shot, Large snowflake die, White Gel pen, Vintage brads
With as freezing cold as it is this morning, I wouldn't be too surprised to look out and see real snowflakes! The sun is shining, so hopefully it warms up a bit. Enjoy your day!
I did a workshop last night and had such a good time! My hostess loves Halloween just like I do, so I knew she would especially love her hostess gift and the first project I demo-ed. She has an adorable 5 month baby girl so I know she'll be taking lots of photos of her on her 1st Halloween, so I demo-ed this cute little 6x6 page along with a matching clip to hold it. I used the Haunting jumbo wheel along with the super cute new Halloween set from the Holiday Mini - Eat, Drink & Be Scary. I used the Big Shot and the Bigz scallop die to create the jagged edge, black mat for my circle. I just ran it through my machine twice - the 2nd time off set to get the jagged look. See the cute star embellishment on the hat? It is a piece of On Board chip board with Cosmo Glitter applied using Heat & Stick powder.
Other supplies used: Perfect Plum designer Prints Paper, Pumpkin Pie grosgrain & Kiwi Kiss double sided satin ribbons, Outline Alphabet, Square Scallop & Photo Corner punch, Vintage Brads. As a hostess gift I created a cute pack of Scrap Candy which included stamped images, ribbon, card stock and punched embellishments that can be used for Halloween cards or scrapbook pages. I packaged these together in a cello bag with a topper. Book a workshop with me today and I will create a Scrap Candy pack especially for you!
Enjoy your weekend!
 Here are the other half of the workshop projects I showcased at the mother/daughter workshop this past weekend. The 2nd card I did was using the cute snowman from Punch Pals and some of the Dashing designer paper. This is another quick and easy card, but with the use of punches and the designer paper it looks more detailed.
 Pals & Festive Favorites. These two sets work so well together! I figured she could use the pieces on her scrapbook pages, cards or even on gifts if she chooses to. On this one I even stamped the cello bag with White Stazon snowflakes. I just got the white Stazon so I had to try it out, right?!
  you the other choice. These were made using 6x9 catalog envelopes. First cut the flap off, then score on 3 sides at 1". (not on open end) Wheel with your design of choice, embellish and fold into shape. This is a fun project that can create all sizes of bags depending what size envelopes are used and how you cut and fold them. The past several years I have made lots of different bag-a-lopes at Christmas time for my Christmas cookies.
  I had a Mother/Daughter workshop over the weekend. Most of the daughters were little girls around 10 years old. They were so cute, and I had so much fun teaching them how to stamp! They were such an attentive audience and I could tell they really enjoyed the projects we did. One of the cards I demoed was this one using the Big Bold Birthday set. Of course I had to use pink and other bright colors since that's what most little girls like! (and some of us big girls too!) It was a nice change because I've been using mostly all Christmas colors the past few weeks.








