Creations by Lynn Weiss ~ Independent Stampin' Up! Demonstrator

ENJOY ~ INSPIRE ~ CREATE ~ SHARE


Wednesday, December 15, 2010

Quick & Pretty Gift Bag

Hopefully you have most of your Christmas shopping done and are now getting ready to wrap your gifts. Please don't tell me you are all done and even have them wrapped! Today I want to share a quick and beautiful way to give a small gift.


This is one of Stampin' Up's Treat Bags, which are on the Clearance Rack in my online store right now. All I had to do was fold it into shape and decorate. It's the perfect size to hold jewelry, home baked goodies, or other small treats. I added a bow made from Purely Pomegranate Satin Ribbon (this was also on clearance, but I think it is now sold out.) and a gift tag using the Delightful Decorations stamp set and matching punch. In just a few minutes I had a beautiful bag to hold some homemade candy.

Have a delightful day!
Photobucket

Monday, December 13, 2010

Woodland Walk With Fifth Avenue Floral

I had not used my Fifth Avenue Floral set in quite some time, but when I had to make a sympathy card last week I wanted to use something besides my go to set...Thoughts & Prayers. It's such a pretty set, I should really use it more.

The rose was stamped in Basic Brown and watercolored using Blushing Bride ink. The paper used was from the Woodland Walk collection. I layered Victoria Crochet Trim over some wide Chocolate Chip Satin Ribbon. The sentiment is from a retired set called Brighter Tomorrow.

We were hit hard with our first snowstorm of the season. It sure looks beautiful outside. The roads were pretty bad last night when I was out...glad I get to stay home today. Time to finish my Christmas cards!
Photobucket

Friday, December 10, 2010

Merry Crittermas!

I decided this is going to be my Christmas card this year...I just need to hurry and make 49 more of these!


I'm totally kidding! It was fun to make one, but with all the cutting involved I'd end up in a real rubber room if I attempted to make 50. (but I bet you were impressed for a minute! ;-) Here's a closer view of the cute little critters.

They were all stamped in Black Stazon on Whisper White cardstock and then I watercolored them using my aqua painter and classic inks. I used a combination of Iridescent Ice EP and Frost White Shimmer paint to create the snowy background. The trees are also highlighted with sparkling snow...but it doesn't show up in my photo.

Stamps: Merry Crittermas, Serene Snowflakes
Card stock: Whisper White, Marina Mist, Certainly Celery & Real Red
Ink: Black Stazon, Marina Mist and various other classic inks
Accessories: Aqua Painter, Marina Mist grosgrain, Iridescent Ice EP, Frost White Shimmer paint, Decorative label, Large & Small Oval punches, Rhinestone Jewels

Have a GREAT weekend!
Photobucket

Wednesday, December 08, 2010

Just Believe Birthday

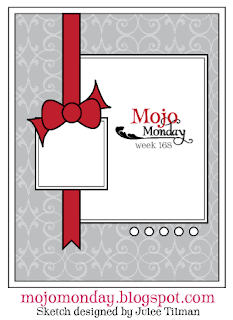
Thank you so much for the nice feedback on my blogs new look. I guess that means it must be showing up properly on your screen...so that makes me happy. Today I have a birthday card to share that I created using this weeks sketch at Mojo Monday.

I used a shadowing technique on the main image by first stamping it in Marina Mist ink. Using my
Stamp-a-ma-jig I offset the image a bit to the left, and stamped it again in VersaMark and embossed it with Winter White EP.


Stamps: Just Believe, Watercolor Trio (sentiment)
Card stock: Pear Pizzazz, Early Espresso & Marina Mist
Ink: VersaMark, Pear Pizzazz, Early Espresso & Marina Mist
Accessories: Vintage Wallpaper Embossing Folder, Winter White EP, Heat Tool, White Organza Ribbon, Basic Pearls & Stamp-a-ma-jig

Thanks for stopping by today!


Photobucket

Monday, December 06, 2010

A New Look For Winter

I've been busy playing with My Digital Studio the past few days. I thought it would be fun to give my blog a new look for the winter months. I had used MDS to create my header and buttons previously, but had always wanted to try a background as well. Until I found this great tutorial on Debbi's Design blog, I wasn't sure how to do it. Thanks Debbi, you rock!

I used the Winter Post stamp brush set and two of my fav SU! colors...Baja Breeze and Certainly Celery for my blog makeover.

The only thing I couldn't figure out, is how to keep my design on the background from enlarging so much? If anyone can give me some tips on this I'd appreciate it. Other than that, everything is showing up on my monitor  pretty much how I wanted it...now I'm just hoping it is showing up on your end as well! Please let me know if things are not loading properly for you.

Unfortunately I had to make several sympathy cards over the weekend...those are always hard. Today I hope to work on my Christmas cards some more...it's getting closer! Have a GREAT day!

Photobucket

Saturday, December 04, 2010

Dasher Through the Snow

This is another card we did at my recent Christmas Card Class.

The Dasher image was stamped in VersaMark and then embossed with Winter White EP. The dry embossed snowflake background used the Northern Flurry Embossing Folder and then the snowflakes were highlighted using Frost White Shimmer Paint carefully applied with a Sponge Dauber. The snowdrift Dasher is standing on was also created using the Shimmer paint & dauber. Then it was spritzed with Vanilla Shimmer Smooch Spritz. The Rhinestone Jewel in the center of the snowflake (from Northern Frost Decorative Strip) adds even more sparkle to this card.

So far we have only had a dusting of the white stuff here...but it won't be long, I'm sure! Enjoy your weekend!

Photobucket

Thursday, December 02, 2010

Deck the Halls With Good Cheer

Well, I certainly have not been a very good blogger the past few months, have I? I have been making time to get creative with my stamps, inks and papers, but I guess just not taking the time to post. Here's a card I designed for a Christmas Card Class I had recently.

Since I used this design for a class and they were making multiples of each card, I had to come up with a quick way to add color... So, the whole image was inked in Soft Suede, and then the ink from the reindeer's nose and "Happy Christmas" was removed using a Q-tip dampened with Stampin' Mist. Those areas were then re-inked using a Cherry Cobbler marker. Subtle color was added to the rest of the design using Stampin' Pastels. Details such as the berries on Santa's crown were colored using the pastels and a Blender Pen.

This old fashioned Santa image goes perfectly with the vintage designs in the Deck the Hall papers from the Holiday Mini catalog. The ribbon used is Cherry Cobbler Seam Binding. I LOVE this stuff! It is so soft and easy to work with, and has a nice sheen to it.

I like the way this turned out, and it was fairly quick & easy. I think I may make more of these to send out as one of this years Christmas cards...I really do need to get crackin' on that!
Photobucket

Thursday, November 11, 2010

Just a Sliver

I finally got a chance to ink up this adorable image from the Level 1 Hostess Set, Birthday Bakery. It was fun to watercolor the row of cute cakes, plus I love the sayings that come with this set...so cute! You cannot really tell from my photo, but all of the cakes are "iced" with Crystal Effects.
Stamps: Birthday Bakery
Ink: Black Stazon, Chocolate Chip plus various other Classic Ink for watercoloring
Card stock: Pretty in Pink, Chocolate Chip, Pink Pirouette & Whisper White
Accessories: Pretty in Pink Satin Ribbon, Chocolate Chip Satin Ribbon, Chocolate Chip Epoxy Brads, Perfect Polka Dots Embossing folder, Scallop Trim Border, Word Window & Modern Label Punches, Aqua Painter, Crystal Effects

Thanks for stopping by...ENJOY your day, and remember...this is no day for "just a sliver!" ;-)
Photobucket

Saturday, October 30, 2010

Shadowbox From the Crypt

October has been such a busy month for me that I have really neglected my blog! We had our annual Halloween Party this past weekend. It was our 21st...and maybe our best one to date. We had perfect weather...in the 60's, very little wind and even a full moon. Over 80 adult guests showed up and almost everyone came in costume! We had a live band, so that made the night even more fun. It took a LOT of planning but it was worth it because we all had such a good time. We spend a lot of time decorating our barn (where the party takes place) and our yard for the event. What little stamping I did this month had to do with Halloween...so I'm hoping you won't mind one more Halloween post from me.

I made this little shadowbox to add a spooky accent to my bathroom. It was really hard to get a good angle to take this photo as to not get glare from flash on the glass, so it looks like it's all crooked inside the frame, but it really isn't. Anyways... all I did was emboss the cool skull image from the set From the Crypt in Black EP on a piece of Cast A Spell DP. (retired, but available in MDS) I added some green jewels to his eyes, and some orange ones to each corner and even to the spider I had attached to the back using fishing line and a Glue Dot. The mat is decorated with the purple print from the Cast A Spell collection and then I added some of the Black Designer Jewels (available in the Holiday Mini) on two corners. The little spider and web designs are rub-ons from Heidi Swapp. I had this little shadowbox stashed away for a while. I'm pretty sure I got it at Target's Dollar Spot a while back.
We always give away small prizes at our parties for the best costumes. This year I used the tombstone image from Graveyard Gala and omitted the words. I cut out the tombstones and added the prize categories with my Black Journaler and created these candy mugs. In case you are wondering what I dressed up as, here's a photo from our haunted barn.
We were a corpse bride & groom. I got all of our clothing from Salvation Army and secondhand shops and then distressed them to look old and tattered. I was happy with the results and spent less than $30 total for both costumes...less than the price of one pre-made costume.
I have a couple card classes coming up, so I'm sure I'll have some new things to share that are not Halloween oriented real soon. Have a hauntingly good weekend!


Photobucket

Friday, October 15, 2010

Be-Jeweled Pumpkin

Last year on the cover of BH&G Halloween magazine there was an elegant be-jeweled pumpkin that I just loved. I searched everywhere for adhesive backed flourishes so I could recreate it, but had no luck finding them. Much to my delight, in this years Holiday Mini Catalog SU! is offering Black Flourish Designer Jewels...just what I had been searching for last year! So of course I bought a couple of packages so I could recreate that bewitching pumpkin I had coveted since last year.

As you can see, I also found some purple flourish jewels as well. I used a 9" foam pumpkin and just attached the flourishes all the way around. I used 2 packages of the SU! flourishes, but still have most of the jeweled strips left on both sheets to use for future projects.
It makes a festive centerpiece on my dining room table. You can also see a spooktacular handmade Halloween card I received in the mail from a friend of mine who loves the holiday as much as I do.

I hope that whereever you live, you have been blessed with a gorgeous Indian Summer, like we have here in Michigan. The weather has been wonderful and the colors have been amazing. Here's a couple photos I took last weekend in Northern Michigan. The first shot is overlooking the Grand Traverse Bay.

Thanks for stopping by today! ENJOY the weekend!!!
Photobucket

Tuesday, October 05, 2010

Halloween Invitations From the Crypt

Like I told you in my last post, I've been busy getting ready for our upcoming annual Halloween party. I even managed to send out some cool handstamped invitations. I'm ashamed to say that the last couple of years I've relied on E-vite or Facebook to invite everyone...oh the horrors, right!? Here I am sitting here with all these fabulous Halloween stamps and then not sending out handmade invitations? It ended up being well worth my effort, because I've gotten so many nice comments from those who have received them and they are excited about the party.


Here is a close up of just one of the invitations.

I stamped the skull image from the set From the Crypt on Glossy card stock using Black Stazon and then sponged on Certainly Celery, Pumpkin Pie & Perfect Plum ink. The Perfect Plum layer is embossed using the Spider Web Embossing Folder found in the Holiday Mini Catalog. The little tag is from the retired set Eat Drink & Be Scary, but if you have My Digital Studio, it is included there. I embossed the tag with Black Embossing Powder. The spider web border along the bottom was created using a Martha Stewart punch.

For the inside I printed the info on my computer but then did a little stamping using Pumpkin Pie ink and images from both Graveyard Gala & From the Crypt.

I couldn't mail these bad boys out in a naked envelopes, right? So I used the Midnight Musings Jumbo Wheel to decorate the flaps, and added a couple spiders for good measure.

Thanks for dropping by today...ENJOY your day!

Photobucket

Saturday, October 02, 2010

Just Believe in Elements of Style Gift

The past couple weeks I've been busy preparing for our annual Halloween Party...working on costumes, decorating the house and creating our invitations...so my blog has become very neglected. I can't wait to show you the Halloween invites I made, but I just got those out in the mail a couple days ago and don't want to post those here yet because a few of my guests look at my blog from time to time. Instead I have a little thank you gift I made for a friend a while back and never posted.

I had a whole bunch of photos for her from our annual girls weekend along with some goodies from Bath & Body Works. So I stamped a large cello bag (from Bath & Body Works) using White Stazon and the pretty swirl stamp from Elements of Style.

I made a little box to hold the photos using a piece of Certainly Celery card stock which I also stamped with the swirl stamp from Elements of Style. I used the 1 - 3/8" circle punch to cut a notch in the top so the photos were easy to pull in & out of the pouch.
The label for the photo pouch and the little thank you card attached to the bag were quick and easy to make using the Just Believe set. I finished the gift by adhering some adhesive backed Rhinestone Jewels and tying on some Baja Breeze ribbon.
Have a wonderful weekend!

Photobucket