Creations by Lynn Weiss ~ Independent Stampin' Up! Demonstrator

ENJOY ~ INSPIRE ~ CREATE ~ SHARE


Thursday, July 25, 2013

Morning Meadow Color Blocked Collage

I inked up a couple different sizes of my Clear Mount Blocks to create the background for this card using the Hostess Set Morning Meadow. I guess I was in the mood to ink up my tools as I did the same with the Beautifully Baroque Embossing Folder before running it though my Big Shot.

I used all 4 of the image stamps from this set to create the collage look and when I was done I used the En Francias background stamp as well. I'll add a greeting (or not?) when I'm ready to send the card. Here's what I used:

Stamps: Morning Meadow & En Francias
Card stock: Soft Sky, Very Vanilla
Ink: Crumb Cake, Soft Suede, Soft Sky & Primrose Petals
Accessories: Beautifully Baroque Embossing Folder, Basic Pearls, Pansy Punch, Primrose Petals Stitched Satin Ribbon & Sponge Daubers

Thank you for visiting me today!

Monday, July 22, 2013

Flower Shop Quatrefancy

The Quatrefancy Specialty Paper is really nice...love the patterns and bright colors. I used it here along with the coordinating set, Mosaic Madness and the Flower Shop set.

I wanted to use Rich Razzleberry in my design and to make it coordinate even nicer with the paper I stamped one of the small mosaic images onto the DSP in Razzleberry ink.

Stamps: Mosaic Madness, Flower Shop & Sweet Essentials
Card stock: Daffodil Delight, Basic Black, Tangerine Tango, Rich Razzleberry & Quatrefancy Specialty Paper
Ink: Tangerine Tango, Rich Razzleberry & Whisper White Craft
Accessories: Pansy Punch, Modern Mosaic Embossing Folder & Brights Candy Dots

Thanks for visiting today!

Wednesday, July 17, 2013

Lovely Trees at Sunset

When playing around with the watercolor background technique a while back I thought I'd try creating a sunset (or sunrise?) background for one of my all time favorite stamps...the row of trees from Lovely as a Tree. Here's what I came up with...

Other than adding a scored border to frame the image, I left it rather plain so I can add a sentiment later (or not?) when I need a card to send off in a hurry. Here is another version...
Again, I left off the sentiment to add at a later time when needed. If you haven't tried the watercolor background technique yet, the instructions on how to create this fun background are here.

Have a great day & keep cool! It's so hot & humid in Michigan right now! I'm glad my stampin' lair is downstairs where it's always nice and cool...I'm heading down there shortly.

Saturday, July 13, 2013

Make A Wish!

Another one of my favorite images in the new catalog has to be this one with the row of patterned birthday candles...it's so cute & fun! It's actually the Birthday Candle Jumbo Wheel, so it will be versatile for creating scrapbook pages and party decor, as well as fun cards like this one.

I used some Dazzling Details on each flame for a little sparkle. Here's a closer look
This will be one of the cards we will be making at my next All Occasions Card Class on August 13th. Check out my events page for more info on this and other upcoming classes.

Have a wonderful weekend!

Wednesday, July 10, 2013

Morning Meadow Pair

I finally received my first new catalog order, and here are the first cards I created using my new goodies!

The Hostess Set Morning Meadow caught my eye right away and I am glad I finally got to add it to my collection. I made a pleasant discovery while playing with this set...the pretty label works nicely with one of the Framelits from the Apothecary Accents set.

It's funny...in real life the subtle tone on tone stamped background using En Francais doesn't show up as much as the pretty embossed texture from the Beautifully Baroque EF does...put in the photograph its just the opposite. Here's a closer look at each card...

Not sure which one I like better?
Which one do you prefer?

Tuesday, July 09, 2013

Cheerful Daisies

Here's a bright & cheery card I made a while back using the Best of Flowers stamp set...I thought I had already posted it...but guess not!

Stamps: Best of Flowers & Sincere Salutations
Card stock: Melon mambo, Basic Black, Tangerine Tango & Rich Razzleberry DSP
Ink: Black Stazon, Tangerine Tango & various other Classic Inks for watercoloring
Accessories: Basic Rhinestones, Black Polka Dot Scalloped Ribbon, Label Framelits & 1-1/4" Scallop Circle Punch

Have a great day!

Tuesday, July 02, 2013

Colorful Field Flowers

Here's another colorful card that uses the watercolor background technique I shared here last week.

Stamps: Field Flowers, Creative Elements & En Francais
Card stock: Calypso Coral, Coastal Cabana & Whisper White
Ink: Rich Razzleberry, Elegant Eggplant, Calypso Coral, Melon Mambo, Bermuda Bay, Pear Pizzazz, Old Olive
Accessories: White Organdy Ribbon & Adorning Accents Edgelits

Thanks for stopping by today!

Friday, June 28, 2013

Soft Wildflower Meadow

I played around with a fun technique using White Craft Ink and the Wildflower Meadow stamp. Not sure what the technique is called, but I love the results!

I just stamped the image onto Crumb Cake using the White Craft ink and let it dry...or you can use your heat tool to speed up the process. Then I used my Aqua Painter and various Classic Inks to add color to the flowers & hummingbird. The result is soft, pretty blended colors that mix a bit with the white ink. You cannot tell by my photo, but I also painted over the top with some shimmer spray to give the flowers some extra sparkle when the light hits it.

I was inspired to try this technique when I saw this pretty card . She used blender pens instead of the aqua painter on hers...so that's another alternative. I just prefer the aqua painter myself, so that's what I used. Here's another card I also created with this technique. Both cards use the new In Colors as my color palette. (with the addition of Wisteria Wonder to the top card)

Have a lovely weekend!

Wednesday, June 26, 2013

An Epic Blue Ribbon Grad (and birthday too!)

Today I have a couple cards to share using the exact same products...one for a graduation and one for a birthday. I love how versatile the Blue Ribbon stamp set is!

The Epic Day DSP has a lot of fun designs...so it was easy to make the cute little pennants. I was also able to personalize them really easily by adding the year using the Designer Type Photopolymer Stamp Set. Here's the birthday version...
I decided to wait to personalize the little banner when I know who the card is going to.

Have an epic day!

Monday, June 24, 2013

Easy Watercolor Background Tutorial

I shared a card here on Friday and have since gotten several emails asking exactly how to do the background. It's a really fun technique to play around with and very simple to get beautiful results. I'm not really sure what it's called...so I'm just going to call it the watercolor background technique. I took photos of each step to show you exactly how to do this.

Step 1: Gather supplies. For this project I used:

  • Acrylic Block I
  • Stampin' Write Markers: Calypso Coral, Rich Razzleberry, Melon Mambo, Bermuda Bay, Pear Pizzazz & Old Olive
  • Whisper White card stock cut 5 1/2" x 4
  • Stampin' Spritzer filled with water
Step 2: Swipe markers across acrylic block to create strips of color, blending each color into the next as shown below.
Step 3: Lay the block onto Stampin' Scrub and spritz with water. I found that about 4-5 spritzes across the block was perfect...but this is really where you'll have to experiment to find the look you are going for.

Step 4: Pick up block and tilt slightly if you wish to blend colors further...it will look something like this.
Step 5: "Stamp" your background onto your base, being careful to lay it down straight. I left about a 3/8" border along the top (which will actually be the side of my finished card) Hint: press on the block and allow it to sit for a minute so the paper will absorb all the ink & water.
Allow the panel to dry before going on to the next step. I just kept making more back grounds and when I was done with that the panels were dry...so maybe an hour or so. Or if you are in a hurry use your heat tool to speed up the dry time. Hint: Create a small background, using this same technique & colors, on some scrap for any images you may want to stamp & punch out.

Step 6: Use post it notes to mask the edges of your watercolor background. Hint: if your ink pads are very juicy, you may want to also use some scrap paper over the post it notes so that the ink doesn't bleed through.

Step 7: Stamp your focal images first. I used the Papillon Potpourri stamp set with Tangerine Tango, Rich Razzleberry & Island Indigo ink.
Step 8: Stamp your small scrap background to punch. I used Rich Razzleberry.
Step 9: Fill in with a swirl...I used the pretty flourish from Everything Eleanor inked in Rich Razzleberry, Melon Mambo & Coastal Cabana.
Step 10: Stamp En Francais over entire design. I inked mine in Island Indigo and then stamped it off once so it wasn't so dark. I also pressed in the areas that I wanted it to be a little darker.
Step 11: The best part! Pull off the post it notes to reveal your fabulous work of art! Proceed to embellish as you wish to create your finished card. Here's what mine looks like...
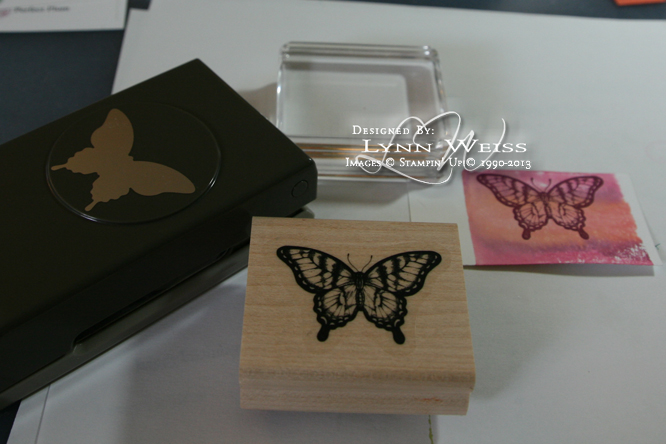
I used the Needlepoint Border to emboss my edges, popped up the punched out butterfly and stamped my sentiment, from Blooming With Kindness, in Coastal Cabana and adhered it to a base of Pool Party card stock.

I hope you'll give this technique a try, if you haven't already. I also hope you like this look because I'll be sharing several more cards I have created using this technique in the next couple weeks.

Friday, June 21, 2013

Grateful Creative Elements

I love the pretty, blended colors that make up the background strip of this card using markers & an acrylic block. After I created the background panel, I masked the edges with post it notes and stamped flowers & the swirl from the Creative Elements stamp set along with En Francais.


Can you guess which punch or die cut I used to create the label for my sentiment? At first I was just going to use it as a stamped strip, but after playing around with some of my framelits I came up with an easy way to make this die cut label using the Apothecary Accents Framelits. Check it out...

  1. Just cut a strip of card stock just under an inch wide...so approximately 15/16 or 7/8 inch wide. 
  2. Stamp the label image from Creative Elements. 
  3. Line one end up under the framelit, allowing the other end to lay on top, as shown above.
  4. Place top cutting pad on top of framelit carefully. Tip: you may want to use post-it notes or temp adhesive to hold it securely in place...if like me you don't yet have the Magnetic Platform Pad. It's on my next order and can't wait to get it!
  5. Start to roll thru the Big Shot, but stop after it cuts the end, and reverse back out instead of rolling all the way through. Hope that makes sense...rolling all the way through will just kind of crease up the other end a bit.
  6. Repeat steps 3-5 to cut the other end of the label.
I then embossed my sentiment, from Apothecary Art, using White EP. I think I'll be using this image so much more now that I've discovered this!  

Have a great weekend!

Saturday, June 15, 2013

Father's Day Coast To Coast

I was doing some re-organizing in my stampin' space recently and started looking through some of my favorite retired stamp sets. One of my very favorites has to be Coast To Coast...so I decided to use it for my Dad's Father's Day card this year.

This beautiful lighthouse image was stamped in Black Staz-on onto a leftover Behr paint chip that I brought home when trying to decide on a color for my bath a while back. Good way to recycle! Two of the colors were almost a perfect match to Night of Navy & Brocade Blue (retired), and just for good measure I added some Cherry Cobbler!

The En Francais background was stamped in Night of Navy. The "Happy Father's Day" greeting is from Teeny Tiny Wishes and I stamped it inside a Bitty Banner image inked with just my marker to eliminate the original wording. I also used Tiny Tags (a newly retired favorite) along with "Dad" from Fancy Flexible Phrases.

Happy Father's Day to all the wonderful Dad's out there! I hope you get to spend time tomorrow with all the favorite Father's in your life!